Sunday, 31 March 2013

In Memory Of...

Happy Easter!

Today is a day to be joyful and a day to mourn. I think of Kevin's Oma. It will be a difficult day for his family, but I'm so glad they can all be together to celebrate her life. And as Kevin's brother said, it is fitting that we celebrate the resurrection of our Lord this weekend. We can be comforted to know that Oma is now with her husband, and with her Heavenly Father.


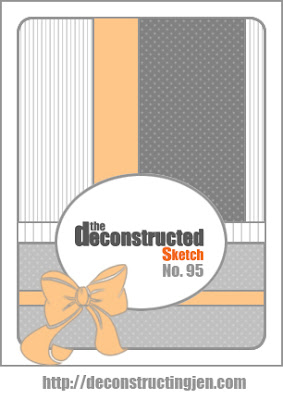
Today's post is a sympathy card for Kevin's parents. I followed the Deconstructed Sketch this week. It has potential for lots of layers! I also picked the colour combo from The Play Date Cafe, but added one more colour as I had a hard time incorporating just 3 colours in this sketch.


This is a nice soft and subtle colour combo - perfect for a sympathy card. I used Perfect Plum, So Saffron and Very Vanilla. I saw light green in the inspirational photo, so I decided to add Certainly Celery as the 4th colour. I added strips of designer paper for the top half and embellished the bottom half with Certainly Celery ribbon. The sentiment is stamped in Elegant Eggplant within an oval embossed frame. Stamped flowers and leaves border the frame.


Thanks for visiting. Have a blessed Easter!
 
Card Ingredients:
 
Stamps: Love and Sympathy, Bloomin Marvelous (Sale-A-Bration 2013)
Paper: So Saffron, Perfect Plum, Elegant Eggplant, Certainly Celery, Very Vanilla, Subtles DSP
Ink: Elegant Eggplant
Tools: Embossed Oval Frame, Bird Builder punch
Accessories, Certainly Celery ribbon (ret.), pearls (Michael's)

Saturday, 30 March 2013

Inspired By... Springtime Party Decorations!

I had an early start to my Saturday morning. Ended up having to take my hubby to the airport. He is on his way to Ontario today. Unfortunately, his Oma passed away a couple days ago. :( I didn't know her very well, but from what I heard she was a wonderful lady. Kevin has very fond memories of her and Opa. Wish I could go along to Ontario to celebrate her life with his family.


On a brighter note, time for a new challenge!

For today's challenge, Karly chose a colourful, springtime photo of party decorations.

 
What a fun inspirational photo! I knew right away that I would use the colours in the tissue paper decorations - Gumball Green, Wisteria Wonder and Melon Mambo. The picture also looks like a set up for a spring birthday party. So I decided to make a colourful birthday card! I pulled out a die that I hadn't used yet (still in its original package) -- the pinwheel die. This was a good investment! It's so easy to make pinwheels with this die! Here's how my card turned out:

 
I like the simplicity of it. I wanted to keep the pinwheels as the central focus I used Certainly Celery for the card base and coordinated it with Gumball Green. I added the sentiment "happy Birthday wishes" and Gumball Green stitched satin ribbon to embellish the card.


I am also entering this card in Simon Says Stamp. Their challenge this week is "Anything Goes". 
 
Thanks for visiting! Stop by Karly's Creations to see how this photo inspired her!
 
Card Ingredients:
 
Stamps: Petite Pairs
Paper: Certainly Celery, Gumball Green, Whisper White, 2012-2013 In-Colour DSP, 2012-2014 In-Colour DSP, Brights DSP
Ink: Gumball Green
Tools: Pinwheel Die
Accessories: Silver brads, Gumball Green stitched satin ribbon, toothpicks

Friday, 29 March 2013

KCRR#11 and Mojo286 {Nautical Father's Day}

It's the long weekend! Yesterday did not 'fly by' as I thought it would. It was pretty quiet at work. Karly and I were anxiously waiting for 4:30PM to come around! And when it did, we were outta there! I picked up my hubby from work and we enjoyed a nice dinner out at Mr. Mike's. It was good to catch up over dinner with no distractions. I came home to a surprise in the mail from my younger sister, Esther! She sent me a t-shirt, candy and a sweet card - so thoughtful!

 
Time for a new challenge!


The items randomly chosen for this week's KCRR challenge are:

Nautical
Sahara Sand
 
I see another masculine card in order! The one stamp set Stampin Up has that is nautical is "Open Sea". I love this stamp set! It's so perfect for masculine cards. Sahara Sand is not a neutral that I turn to often, so this was a nice change. I used it for the card base and Nautical DSP (ret.) for the background. I followed the new sketch by Mojo Monday and decided to make a 5" x 5" square card.


The strip of Very Vanilla cardstock was stamped with the background stamp in the "Open Sea" set. I then crumpled up the paper and sponged it with Tim Holtz Distress Ink, to make it look like 'old' paper. The bottom edge is punched out with the Spiral Border punch (ret). The stamped compass is bordered with Early Espresso cardstock and popped up to give it some dimension. I fussy-cut the stamped anchor image and stamped the sentiment "happy father's day" and hung both from linen thread.


Thanks for stopping by! Make sure to hop on over to Karly's Creations to see her card for this challenge!
 
Card Ingredients:
 
Stamps: Open Sea, Teeny Tiny Wishes
Paper: Sahara Sand, Early Espresso, Very Vanilla, Nautical DSP (ret.)
Ink: Early Espresso, Tim Holtz Distress Ink Antique Linen
Tools: 1-1/4" Circle punch, 1-3/4" Circle punch, Modern Label punch, Spiral Border punch (ret)
Accessories: Linen Thread

Thursday, 28 March 2013

FMS79 {Sailing Away}

Happy Friday! Ok, well technically it's Thursday, but it's the last work day of the week! Hoping this day will fly by! Another highlight... have a look at our weather forecast for the weekend:

It's going to be gorgeous! I see a couple of nice leisurely walks in the sunshine in order for this weekend :)

I was getting so tied up in making flowerpot cards that I almost forgot about my card for today's post! So I went through the card challenges that came out today and chose a new sketch from Freshly Made Sketches and a colour combo from Scrapmaster's Paradise.
 

These colours could either be used for a baby boy card or a masculine card (in my opinion). I chose to make a Father's Day card. I used a Sailboat stamp set that I bought from a craft store in London, ON (can't remember the name, unfortunately) and made a fairly clean and simple card. Here's how it all got pieced together:

 
I love the layout! I think this is one I may turn to more often. And the colours coordinate so well together! I popped up the matted sailboat image and stamped birds in the corner. Early Espresso taffeta ribbon is added to embellish the card.
 
 
A perfect masculine card, don't you think?
 
Thanks for stopping by! Make sure to visit tomorrow for a new KCRR challenge!
 
Card Ingredients:
Stamps: Unknown
Ink: Early Espresso
Tools: Scallop Border punch
Accessories: 1/8" Early Espresso taffeta ribbon 

Wednesday, 27 March 2013

A Birthday Card for a Sweet 2-Year Old

Since my hubby is out of town for work for a couple days, I hope to take this opportunity to make a lot of papercrafts for the upcoming craft fair. Last night, after cleaning a pile of dishes and organizing a bit more of my crafting supplies, I completed a few more Z-fold cards. Hope to get more done tonight!

Today is a special birthday - our neice, Jocelyn, turns 2 today! I met Jocelyn a couple times, but don't know her very well (one of the reasons I dislike living so far from home! My neices and nephews grow up way too fast!). From what I hear, she is an adorable, funny little girl. Here's wishing her the best 2nd birthday!


For her card, I played along with Sweet Sunday Sketch. I wanted to make it bright and colourful, so I chose Rich Razzleberry, Daffodil Delight and Tangerine Tango - love these colours together! And what better stamp set to use for a cute 2-year old, than "Forest Friends"!


I fussy-cut each of the animals and popped them up using dimensionals. I added a matching button with bakers twine to complete the card.
 
 
Thanks for looking!
 
Card Ingredients:
Stamps: Forest Friends, Happiest Birthday Wishes (hostess)
Paper: Rich Razzleberry, Daffodil Delight, Whisper White, Brights DSP, Regals DSP
Ink: Rich Razzleberry
Tools: 1" Square Punch, 1-1/4" Square Punch, Scallop Edge Border Punch
Accessories: Tangerine Tango button (Sale-A-Bration), White Bakers Twine

Tuesday, 26 March 2013

PP#138 {Happy Father's Day}

1 day down, 3 more to go! Looking forward to a relaxing long weekend!
Last night I made some delicious ribs for dinner. We are making a point of going through our freezer and finishing up frozen foods that we didn't even know we had :) I followed this recipe for oven-baked ribs and they turned out great! So delicious! After boiling the ribs, I used the boiling, seasoned water to cook my potatoes in. The only thing I would change is to use less salt than what the recipe calls for. The potatoes turned out to be really salty! But, I would definitely cook ribs again using this recipe!


Today's card is clean and simple. I love the sketch at The Paper Players this week, so I thought I'd play along!


I've been wanting to get a headstart on my Father's Day cards, and this was a perfect opportunity! Here's my card:

 
I kept the layout quite simple with no added embellishments. I stamped a tree from "Lovely as a Tree" stamp set (one of my favourites!). This stamp set is perfect for masculine cards. I found some retired designer paper with a woodgrain design on it and thought it matched perfectly with the stamped tree image. I fussy cut the tree and popped it up to give it some dimension. The flag sentiment is also popped up. You can see it better in these photos:


Thanks for stopping by!
 
Card Ingredients:
Stamps: Lovely as a Tree, Teeny Tiny Wishes
Paper: Crumb Cake, Chocolate Chip, Very Vanilla, Neutrals DSP, ? DSP (ret.)
Ink: Chocolate Chip, Old Olive marker, Chocolate Chip marker
Tools: Circles Nestabilities, Scallop Edge Border punch

Monday, 25 March 2013

Monochromatic Pinks and a Triple Challenge

It's a 4-day work week! Crazy how early Easter is this year! But I'm not complaining :) Nice to have a stat holiday in March. I've had quite the productive weekend. Made lots of Mother's Day cards, gift card holders and my latest paper creation -- flower pot cards! I love these!


Definitely making more of these for the upcoming craft show! I found simple instructions on how to make these here.

For today's card I combined a couple challenges. Dynamic Duos has a monchromatic colour combo this week and Friday Mashup has a triple challenge (brayering, sketch, and butterflies).


1. Make a project using the "Sketch".
2. Or Make a project using "Butterflies & Your Brayer".
3. Or "Mash it Up" and create a project with "your Brayer using the Sketch and add some Butterflies"
 
I decided to mash it up and use all three along with the monochromatic pinks. This challenge encouraged me to take out my brayer (it was still in its original package!). I love sponging, but brayering is definitely an easier way to spread ink over a larger surface. I embossed Whisper White cardstock with the Elegant Bouquet embossing folder and brayered it with Crumb Cake ink. I like how it makes the embossed image stand out.
 
I added Regal Rose and Pretty in Pink designer paper for the background. I completed the card with butterflies and taffeta ribbon. I think it makes the perfect birthday card for a little girl!


Thanks for stopping by! 
 
Card Ingredients:
 
Stamps: Teeny Tiny Wishes
Paper: Chocolate Chip, Pretty in Pink, Whisper White, Brights DSP, Subtles DSP
Ink: Crumb Cake, Chocolate Chip, Regal Rose
Tools: Beautiful Wings Embosslits, Elegant Bouquet embossing folder
Accessories: Regal Rose 1/8" taffeta ribbon, rhinestones (Michael's)
 

Sunday, 24 March 2013

A Spring Mother's Day Card

Saturday was a good day. I spent part of the morning doing devotions. I'm doing a topical Bible study, where I pick certain topics, search for related verses in the Bible and keep a journal. Currently I'm studying the topic of 'worrying'. I have a tendency to worry about a lot of things and I need to constantly remind myself that God is in control and he has my whole future in His hands!

I had a pretty productive day -- finished a few loads of laundry, did some housecleaning and made several gift card holders! Here's a picture of them in a few different colours:


I hope to have about 30 or so for the craft show. I also want to make masculine wallet gift card holders!

Last night, my hubby and I went to the aquatic centre for the first time. It was fun! We spent a lot of time in the hot tub, went a few times through the lazy river and relaxed in the sauna. We then went for a coffee date at Timmy's, using up the free coffees that Kevin has been winning through Roll Up the Rim. I, unfortunately, have had terrible luck! I think I've only won once!

I also had time to make today's card! I played along with two challenges: a clean and simple sketch from Freshly Made Sketches and a spring colour combo from Play Date Cafe.

 
I had a couple scraps laying around, one being the negative cut-out from the Little Leaves sizzlit die. I wanted to find a way to use it with this sketch. And when I looked at this colour combo with Play Date Cafe, I saw the Stampin Up colours Elegant Eggplant, Island Indigo, and Certainly Celery. What a nice spring colour combo! Here's my card:
 
 
I like how clean and simple it is. The Island Indigo adds a pop of colour against the Certainly Celery. I love the coordinating polka-dot designer paper in Elegant Eggplant. I think these colours coordinate really well! I would have never thought to put them together!


Thanks for looking!
 
Card Ingredients:
 
Stamps: Teeny Tiny Wishes
Paper: Elegant Eggplant, Perfect Plum, Certainly Celery, Island Indigo, Whisper White
Ink: Elegant Eggplant
Tools: Little Leaves sizzlit die, Circles Nestabilities, Scallop Border punch, Word Window punch


Saturday, 23 March 2013

Inspired By... Adorable Dresses!

Had a great start to the weekend yesterday -- we were let off work early - love days like that! I also had a very productive evening. I completed a few Z-fold Mother's Day cards and got a good start on some purse gift card holders. I decided to make the Z-fold cards in all different colours to give people some choice at the craft show. I love how they turned out!


Today is going to be another productive day – I can just feel it! In addition to some housecleaning, I hope to do a lot of papercrafting. I’d like to add to my stock of Mother’s Day cards, complete several gift card holders and get started on some masculine/Father’s Day cards. We’ll see how far I get! Tonight we plan on heading over to the Aquatic Centre. In the 2 years we’ve lived here, we have never been! Apparently they have a lazy river, a large hot tub, saunas...  It’ll be a great way to relax and beat the winter blues!
It’s time for a new inspirational photo!

It was my choice this week. I found this photo on Etsy. These adorable little girl dresses are made by Fairy Free Designs (check out their etsy shop - such cute items!).

IB #10
This photo inspired me to create a baby girl greeting card with cute little punch art dresses! Here’s how it turned out:

Adorable, right?  I used the Tab punch for the top part of the dress and scallop circle nestabilities for the skirt. I ‘pleated’ the skirt by scoring at the valley of every scallop, if that makes sense. I then added crochet ribbon and ¼” taffeta ribbon around the waist of each dress. The cute sentiment “welcome, baby” with pearls on the scallop circle complete the card.

 
Hop on over to Karly's Creations to see how this photo inspired her! 
 
Card Ingredients:
Stamps: Petite Pairs
Paper: Blushing Bride, Regal Rose, Whisper White, In-Colour 2011-2013 DSP
Ink: Regal Rose
Tools: Tab punch (ret.), Scallop Circle nestabilities, Scallop Circle punch, 1-1/4” Circle punch
Accessories: Victoria Crochet ribbon, ¼” taffeta ribbon (Marina Mist and Regal Rose), Pearls (Michael’s)

Friday, 22 March 2013

KCRR #10 {From My Heart to Yours}

Happy Friday!

Not too long ago I heard about a craft show coming up at the end of April at a local elementary school. I've been going back and forth trying to decide if I should have a booth at this show. I did quite a few craft fairs last fall/winter and had a lot of fun doing them! On the other hand, it took a lot of time and effort to prepare for them. So after much thought, I decided to go ahead and participate in this one!  It's April 21st, so I have exactly one month to make as many handmade papercraft items as I can! My goal is to make a couple cards/projects each night during the work week and then approx. 20 items each weekend (if possible!). We don't have much planned between now and then so that will give me lots of time!

Time for a new card challenge with KCRR!


We picked two items this week and they complement each other quite well!

'P.S. I Love You' Stamp Set
Rose Red

Ok, so if you have seen this stamp set, you will know that it is related to Valentine's day. This was a challenge in itself, to try and find a way to use it without making it a Valentine's Day card (of course, there's no rules against making a Valentine's Day card!). I try to make cards for upcoming events or all occasions. The sentiments in this stamp set can work for Anniversary or Wedding or just a simple love card to give to that special person in your life. I decided to use the sentiment "from my heart to yours." I kept it clean and simple and added just a touch of Rose Red with the neutral colours.

I used a sketch from Viva La Verve Sketch Challenge as a guide.

 
And here's my card:
 
KCRR #10
 
I love the layout. I deviated a bit from the actual sketch and added a bit more detail The Rose Red sentiment and sponging on the hearts adds a splash of colour. I used burlap ribbon from Close to My Heart for the strip in the background. A doily cut out is sponged with Crumb Cake ink, as well as the edges of the card front. A pearl adds a perfect embellishment to the card.


Thanks for looking! Head on over to Karly's Creations to see her take on this challenge!
 
Card Ingredients:
Stamps: P.S. I Love You
Paper: Crumb Cake, Very Vanilla, Soft Suede
Ink: Crumb Cake, Rose Red
Tools: Delicate Doilies Sizzlit, Scallop Circle Punch, 1-1/4" Circle Punch, Heart to Heart punch
Accessories: Burlap Ribbon (CTMH), Pearl (Michael's)