Tuesday 30 April 2013

Mojo Monday #291 {Patterned Occasions}

I had quite the busy Monday, which was nice for a change! It's been pretty slow at work lately for us girls in the office. I'm glad things are starting to pick up! Definitely makes the days go by faster. After work, Kevin and I headed to the mall. A couple days ago, while we were visiting with some friends, I tried my first loose tea from a store called David's Tea. The tea flavour I tried was called "Forever Nuts". It's so delicious!! and healthy too! It's a nutty jumble of almonds, apple bits, cinnamon and beetroot (which makes it turn pink!). After trying that, I just had to go and buy my own :) I think I will be making a stop at that store more often! I've been told "Glitter & Gold" is another good one to try.


We also did some shopping for my hubby, which doesn't happen to often! He loves to dress up and so he wanted to find a new dress shirt and tie. I have to say, there are quite a few bold colours out there for men's shirts, from pink to purple to neon yellow! We stopped at Tip Top Tailors and found a light purple/greyish shirt with a matching tie. I actually quite like it! It's not too purply (if that's a word) and I think he looks rather handsome in it ;)

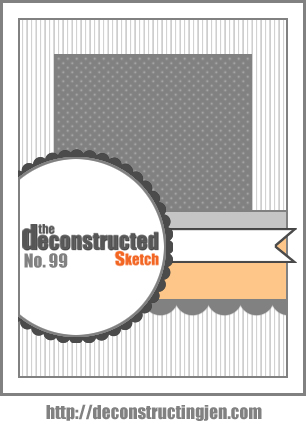
As soon as I saw Mojo Monday's sketch, I knew I just had to play along! I love the layout this week.


I decided to create a regular A2 size card using this layout. I stamped the elephant image from the Patterned Occasions stamp set onto Whisper White cardstock and punched it out using the Extra-Large Oval punch. It fits perfectly in the embossed oval frame. Flagged pieces of designer paper create the background. Lately, my colour combos seem to resort to pink! I chose Raspberry Ripple as the card base and Blushing Bride as an accent colour. They are so lovely together! Gray striped bakers twine and a gray button is added to embellish the card.

 
Isn't that little elephant cute? I decided to not put a sentiment on this card, partly because I didn't quite know where to put the sentiment, and because it gives options to use it for any occasion. 
 
 
Thanks for visiting!
 
Card Ingredients:
Stamps: Patterned Occasions
Paper: Raspberry Ripple, Blushing Bride, Whisper White, In-Colour 2013-2014 DSP
Tools: Oval embossed frame, Extra Large Oval punch
Accessories: Gray bakers twine (CTMH), gray button (CTMH)

Monday 29 April 2013

A Belated Birthday Card for My Sister

We had an enjoyable, relaxing Sunday - went to church in the morning, a walk in the afternoon, and a dinner get-together with friends in the evening. It was a great way to end a good weekend!

For today's post, I decided to share a birthday card that I made for my sister, Monique. The reason I didn't share it on her actual birthday was because she hadn't received it yet and she reads my blog on occasion. Well, I discovered the card one day in my own mailbox, about a week after I had sent it to her - it was returned to me! Apparently, not enough postage... :( It was a little bit thicker than normal because I had stuck a bookmark in it. Well, I let her know it was still coming and she finally received it about a week or so after her birthday... better late than never!

 
I tried to make it a little 'artsy' by adding different materials and giving it a vintage look. The Tea for Two DSP from Stampin Up is one of my favourites. I used it here for the background and the circle in the center. I used burlap ribbon as one of the layers and topped it off with roses and small pearls to embellish it.


Thanks for stopping by and enjoy your Monday!
 
Card Ingredients:
Stamps: Fabulous Phrases, Everything Eleanor
Paper: So Saffron, Soft Suede, Very Vanilla, Tea for Two DSP
Ink: Soft Suede
Tools: Circles nestabilities, Little Leave sizzlit die, Extra Large Oval punch
Accessories: Burlap ribbon (CTMH), Flower Trim Ribbon, Pearls (Michael's)

Sunday 28 April 2013

Craft Fair Highlights and Inspired By... Beautiful Lilies!

Yesterday was a busy day! I had a booth at the Spring Home & Health Fair here in Prince George. There were lots of great vendors promoting their home businesses. It wasn't as big a turnout as I thought it would be, but I still had a lot of interested people visit my table! Here are a few pictures of my display:


I'm glad I get to experience these craft fairs at different times of the year, but I've discovered fall/winter is the best time to take part in craft fairs. A lot of people aren't looking for cards in the Spring. Soon, I think I'm going to start focusing on Halloween and Christmas items for the fall. I've got a good start on all occasion greeting cards!
After a long day of manning a booth, Kevin and I went on a movie date to see G.I. Joe in 3D. It was actually a pretty good movie! It kept me entertained :) Afterwards, I completed the day with creating a card for our "Inspired By..." challenge. I find it's always nice to wind down at my crafting table after a long day.

Karly chose a beautiful inspirational photo of stargazing lilies from her garden (taken last year).

IB #15
 
Aren't they gorgeous?? I love how vibrant the colours are. I was inspired to create punch art lilies and use the bright pinks in my card. Here's how it turned out:
 
 
It may not be the same type of lilies as the photo, but I just love how these calla lilies turned out! And they were super easy to make. All you need is the Build a Blossom punch, a stylus, and the Owl Builder punch. Punch out the 2nd smallest petal and curl in the edges using the stylus. Punch out the small heart from the Owl Builder punch, cut it in half and glue it to the center of the petal (this creates the spike in the middle of the flower). Then, simply glue both edges of the petals together and voila! I cut my own stalks in Certainly Celery and used the leaves from the Bird Builder punch.
 
I created the layout by following the new sketch by My Favourite Things. I really love this layout and will probably turn to it more often for inspiration.


Thanks for visiting!
 

Card Ingredients:
Stamps: Teeny Tiny Wishes
Paper: Melon Mambo, Pink Pirouette, Regal Rose, Whisper White, Certainly Celery, Daffodil Delight, Subtles DSP
Ink: Melon Mambo
Tools: Build a Blossom punch, Owl Builder punch, Bird Builder punch, Scallop Edge border punch
Accessories: Regal Rose 1/4" taffeta ribbon


Saturday 27 April 2013

A Sweet Baby Card

A couple days ago, I decided to sign-up for another home show/craft fair this weekend. It was a very last minute decision, but I'm glad I signed up! I'm looking forward to it and hope it will be a good turn out this time around. I'll give a report tomorrow :)

Usually, Saturday means a new "Inspired By..." challenge. But, this time Karly and I decided to postpone it until tomorrow as we were both busy last night. Stay tuned!

For today's post, I decided to share a baby card that I made a couple days ago using the new Deconstructed Sketch and a pastel colour combo from Color Throwdown.


I love this sketch! It has just the right amount of layers. And I love the soft pastels! This colour combo is perfect for a baby card! I did not have all the colours listed, but found similar colours in my stash of supplies - Certainly Celery, So Saffron, Blushing Bride and Blush Blossom.
 
 
I layered cardstock and designer paper, following the sketch quite closely. Striped pink grosgrain ribbon is wrapped around the card front and rhinestones are added to embellish the card. Isn't that elephant darling? It's from a Verve stamp set that I won from a Mojo Monday challenge a while ago. The adorable sentiment 'sweet little baby' completes the card.


Thanks for stopping by! Make sure to return tomorrow for our new 'Inspired By' challenge!
 
Card Ingredients:
Stamps: To the Moon (Verve), One of a Kind (ret)
Paper: Blushing Bride, Certainly Celery, So Saffron, Blush Blossom, Basic Gray, Whisper White, Subtles DSP
Ink: Basic Gray
Tools: Blender pens, Circles nestabilities, Scallop Circles nestabilities
Accessories: Pink Pirouette grosgrain ribbon (ret), Rhinestones (Michael's)


Friday 26 April 2013

KCRR #15 {Rosettes and Brayering}

Happy Friday!

I placed my "retired" Stampin Up order tonight! Surprisingly there weren't too many stamp sets or accessories that I just had to get before they were gone. However, I did buy the Family Reunion stamp set, the Little Additions stamp set and the Two by Two stamp. I think I will make great use out of these ones! There aren't too many baby-themed images in the catalogue, so I thought Little Additions would be an essential part of my stamp collection. Family Reunion has a lot of useful words that can be used for cards or scrapbooking. And Two by Two is such an adorable image, I couldn't resist! One accessory I just had to get was the Spider Web embossing folder. This will be a fun one to use around Halloween! I also picked up Wisteria Wonder bakers twine -- I'm kind of happy this colour is included in the new Stampin Up colour collections for 2013-2014!

Friday is not only one day closer to the weekend, it is the day we install a new KCRR challenge!


The two elements that were randomly chosen are:

Rosettes
Brayering
At first I wasn't too sure about these two items. Rosettes take some time to put together and brayering is not one of my favourite techniques. But I sketched an idea, put my creative cap on and this is what I came up with:

I absolutely love it! I first made the rosette using polka dot Melon Mambo designer paper. I covered the center with a punched out circle with the sentiment "happy Birthday wishes" stamped on it. Rhinestones are added to embellish it. I wasn't too sure what to do about the background... I know I wanted to do something 'swirly'. I deviated from my original sketch and pulled out my French Filigree background stamp and decided to try the emboss resist technique (I was inspired by Karly's recent card). I stamped it in Versamark Ink, embossed it with clear embossing powder and brayered over it with Melon Mambo ink. It turned out exactly how I pictured it!


To make the rosette, simply cut a piece of designer paper at 1" x 12". Score at every 1/4". Accordion/fan fold and attach the ends together. "Push" down flat and secure it with hot glue in the centre (I find hot glue works the best). Add an embellishment or sentiment to the front and secure to the card with glue dots. 


Isn't it fun? I love how full of colour it is! It is sure to brighten someone's birthday! :)

I am also entering this card in the Just Add Ink challenge this week and the CAS-ual Friday challenge. Just Add Ink's challenge is to add a fun background and CAS-ual Friday's challenge theme is Birthday Bash.

Just Add...a FUN background!


Make sure to hop on over to Karly's Creations to see what she has created using these two elements. Her card is gorgeous!

Thanks for visiting!

Card Ingredients:
Stamps: French Filigree (ret), Petite Pairs
Paper: Pink Pirouette, Whisper White, Brights DSP
Ink: Versamark, Melon Mambo
Tools: 1-1/4" Circle punch, Simply Scored Board, Heat tool, Clear Embossing Powder
Accessories: Rhinestones (Michael's)

Thursday 25 April 2013

Mojo #290 {A Simple Father's Day Card}

I spent some time looking over the Stampin Up retired lists that came out yesterday. Lots of stamp sets are retiring! For a full list, click here. Also, a number of accessories/embellishments are also retiring. - click here to see this list. I've already gone through, crossing off what I already have and highlighting the items that I want to get before they are gone! I also had a sneak peek at the new catalogue - some great new stamp sets and embellishments! Can't wait to share some of these new products with you!

For today's card, I decided to make a simple Father's Day card using a great sketch from Mojo Monday.


I love the four squares in this sketch. I wanted to use a stamp set with small characters/images in it. I came across "A Fitting Occasion" and thought it would be perfect!


I chose the tie stamp and stamped it in all four squares in Night of Navy. I used Well Worn DSP for the bottom half of the card and wrapped Soft Suede taffeta ribbon around it. I stamped and fussy-cut the letters that spell "DAD". They are popped up using dimensionals.


I love how the designer paper and the argyle design in the letters match so nicely! At first I thought this card was too simple, but I actually really like it!

 
Thanks for stopping by!
 
Card Ingredients:
Stamps: A Fitting Occasion, Loved Ones
Paper: Early Espresso, Crumb Cake, Night of Navy, Well Worn DSP
Ink: Night of Navy, Soft Suede
Tools: 1" Square Punch
Accessories: Soft Suede taffeta ribbon

Wednesday 24 April 2013

Retro Sketches #60 and Fab Friday #16 {Sending Love & Sympathy}

I've been patiently waiting for this day to come! Today, Stampin Up demonstrators get to have an early peek at the new Stampin Up annual catalogue!!  So excited to see what Stampin Up has come up with this year! 

Today's card features a great layout based on the Retro Sketches sketch and a nice soft colour combo from Fab Friday.


I thought this colour combo would be perfect for a sympathy card. Summer Startfruit is still growing on me, but I love it with these colours! Here's how my card turned out:

 
To add some detail I embossed the piece of Crumb Cake cardstock with the square lattice pattern. The roses are sponged with Calypso Coral ink and instead of the traditional green leaves, I decided to stick with the colour combo and used Summer Starfruit instead - I like how it turned out! The Calypso Coral bakers twine is the perfect embellishment to complete the card.


Thanks for stopping by!

Card Ingredients:
Stamps: Love & Sympathy
Paper: Pool Party, Crumb Cake, Very Vanilla, Summer Starfruit, In-Colour 2013-2014 DSP
Ink: Calypso Coral
Tools: Circles Nestabilities, Square Lattice embossing folder, Little Leaves sizzlit die
Accessories: Flower Trim ribbon, Calypso Coral bakers twine

Tuesday 23 April 2013

Dynamic Duos #49 and Make My Monday {Wedding Tri-Fold Card}

I had a fun night out last night crafting with a bunch of wonderful ladies! I love attending Cassandra's card classes. (She is my upline for Stampin Up). She gives me lots of inspiration and I look forward to her classes every month! We made 3 beautiful cards:


I love the box card! It's such a fun fold. I'm definitely going to try that one again!

For today's post, I'm playing along with Dynamic Duos and Make My Monday. I thought the colour combo this week would be perfect for a wedding card and I love making fancy folded cards (the challenge this week at Make My Monday is "Fancy Folds").


I made one of my favourite folds - the Tri-Fold. I love this fold for special occasions, like weddings and birthdays. It makes such an elegant card! The actual card base is very easy to make. The only time-consuming part is decorating it, as you have to cut the pieces of designer paper just so to fit the panels on the inside of the card. But, it's worth it in the end! I love the result!
 

I placed textured designer paper on the card front and punched out flowers with an antique brad for the central image. Gray striped bakers twine is tied around the card front and tiny tags hang from it - one of them says "Mr. & Mrs." and the other has an elegant design.
Here are photos of different angles:


The great thing about this card is that it folds flat to 4.25" x 5.5" size and fits perfectly in an A2 size envelope.

Thanks for visiting!

Card Ingredients:
Stamps: Tiny Tags
Paper: Basic Black, Basic Gray, Whisper White, Mocha Morning DSP (ret.), Wedding DSP (Michaels)
Ink: Basic Black
Tools: Scallop Circle Nestabilities, Circle Nestabilities, Blossom punch, Five Petal Flower punch, Tiny Tag punch, Elegant Lines embossing folder
Accessories: Gray Bakers Twine (CTMH), Antique brad

Monday 22 April 2013

Craft Fair Highlights

Yesterday, I had a booth at the Pinewood Elementary Home Business/Craft Fair. There were about 20 vendors there. Some of my favourites were Arbonne, Epicure, TC Creations, Rosebud Baby and Steeped Tea. Everyone had such great displays! It's fun to get to know the other vendors and see so much talent - one thing I love about craft fairs! Here's a few pictures of my display:


I had a lot of fun setting this up! I use baskets to put the greeting cards in for people to leaf through and those cards that I want to display, I put in clear 'magazine' racks. It works out great! I got these from work (they had some lying around that they weren't using) and I found the baskets in my house (originally they are from Michael's). I have a matching vase where I put branches in and hang items from them. At Christmas time I hang ornaments, but this time I decided to hang the purse gift card holders. Some of the other items are just layed out on the table so people can easily spot them. The easel was made by a coworker. He did a great job! I used a bulletin board covered in black fabric and attach string with clothespins to hang the cards from it.
 
I made sure to have a lot of variety. Besides greeting cards, I had purse gift card holders, large mini albums, 3"x3" mini albums, gift tag sets, and bookmarks. Unfortunately, it was a pretty quiet day and not too many people came out. Even though I didn't sell too many items, I still got my name out there!
 
Now that I'm not busy making items for craft fairs, I'll be working on organizing my crafting space for the next little while. I'll be honest, my craft room is a mess right now! I hope to blog about how I organize each part of my crafting supplies, focusing on paper, embellishments, ribbon, embossing folders, dies, and stamps. Stay tuned! :) 

Sunday 21 April 2013

Papercraft Crew #38 {Happy Anniversary}

It's craft fair day! I worked long and hard yesterday making several greeting cards and a few bookmarks. I counted just over 200 cards! Wow! Didn't think I had that many! Looking forward to a good day. Hoping it's a good turnout!

A couple of my projects were top picks this past week:

I was a 'cut above' at Paper Players:


To see my original post, click here.  

 And a shout-out at Retro Sketches:

 
To see my original post, click here

For today's post, I'm playing along with PaperCraft Crew and Stampin Royalty. Papercraft Crew has another fabulous sketch. I'm starting to really love their sketch challenges! This one is going on the favourites list!

 
 Stampin Royalty has an inspirational photo for this week's challenge:


I decided to use the colours in this photo. I chose Raspberry Ripple, Primrose Petals, Blushing Bride and Whisper White to make an anniversary card. Raspberry Ripple is probably my new favourite pink! It is such a rich colour - I love it! I pulled out a new stamp set that I got a while ago, but haven't used yet. It is called Apothecary Art. I definitely have to use this one more often! I thought the flowers in this stamped image represented the flowers on the plate in the picture quite well. I layered a doily and flagged cut-out underneath the apothecary framelit. The sentiment was stamped separately and popped up to give the card some dimension.

 
I just love how it turned out! I added some detail by embossing a stitched line close to the bottom and adding a couple of brads.


Thanks for looking!
 
Card Ingredients:
Stamps: Apothecary Art, Memorable Moments
Paper: Raspberry Ripple, Primrose Petals, Blushing Bride, Whisper White
Ink: Raspberry Ripple
Tools: Apothecary Framelit Die, Beautiful Wings Embosslit, Delicate Doilies Sizzlit, Needlepoint Border embossing folder
Accessories: Brads (Michael's)