Thursday, 27 March 2014

Inspired By... Black & White With a Splash of Colour

I realized yesterday, that I posted our KCRR challenge a day early... All week I've been thinking one day ahead. So unfortunate! This makes the week feel that much longer. However, on the bright side, I have been so motivated this week, both at work and home! Let's hope that continues...

Here is the new inspirational photo challenge a day early this week as well :) 


IB #41

I came across this photo on Pinterest. Not only does it look delicious, but I love the pop of colour against the black and white! And teal happens to be one of my favourite colours! 

Always Playing With Paper has a fabulous sketch this week! I just had to play along :) 


I LOVE these flowers from Fabulous Florets stamp set. They are so elegant! I popped them up to give the card some dimension. The leaves are also popped up. I gave them a watercolour effect by using blender pens to colour them. It gives that extra pop of colour against the black and white. Ruffled ribbon is wrapped around the card front and pearls embellish the card.


Thanks for stopping by! Check out Karly's Creations to see how this photo inspired Karly! 

Card Ingredients:
Stamps: Fabulous Florets, Petite Pairs
Paper: Island Indigo, Basic Black, Very Vanilla, Modern Medley DSP, 2010-2013 In-Colour DSP
Ink: Black Staz-On
Tools: Blender pen, Small Oval punch, Scallop Oval punch
Accessories: Island Indigo ruffled ribbon, pearls (Michael's)

Wednesday, 26 March 2014

KCRR41: The Quilting Technique

Welcome to a new KCRR challenge!


The Quilting Technique
Flower Trim
Beautiful Wings Embosslit Die

Interesting combination of elements! My first thought was... adding all three of these elements on one card could make it look quite busy and cluttered! However, there's always room for some creativity. I wanted to try out a new quilting pattern with paper. I did some Pinterest searching and came across this great pattern. I also loved the colour combo in this card so I decided to CASE it, adding some of my own detail.


I cut off a flower from the flower trim and added it to the center of the quilt design. I used Marina Mist for the butterflies and added pearls to the center of each of them. I love how this card turned out! 


Thanks for stopping by! Make sure to hop on over to Karly's Creations to see how she used these elements in her card.

Card Ingredients:
Stamps: Curly Cute
Paper: Chocolate Chip, Marina Mist, Very Vanilla, Beau Chateau DSP (ret.)
Ink: Marina Mist
Tools: Vintage Wallpaper embossing folder, Beautiful Wings embosslits die
Accessories: Flower Trim, Pearls (Michael's)

Tuesday, 25 March 2014

Paper Organization: Revamped

As I write this, it is snowing outside... I think everyone agrees when I say, this has felt like one of the longest Winters ever! It seems as though Spring will never arrive...  In the meantime, I'm taking advantage of these cold winter nights to organize my crafting area. One of the most important areas of my craft room that needs to be organized (in my opinion) is paper (both cardstock and designer paper). I did a blog post almost a year ago now on Paper Organization (Part 1 and Part 2) and I have improved it a little since then. The filing box system works great, but I thought I would make it that much easier by adding tabs with the actual cardstock colours so I have a good visual:


My photo box of scraps is organized the same way. I used the Tab punch (a retired Stampin Up product) to punch out tabs of each of the colours and then simply stapled them to each ziploc bag. It makes it so much easier to find that specific colour I'm looking for!


And because I've added SO much more designer series paper to my collection, I've had to update my Stampin Up Colour Coordination Chart. Click here to see the latest version. This chart lists the colours alphabetically and in the 2nd column lists the DSP that this colour is in. It's SO handy. I can't count how many times I've used this chart! 

That concludes my paper organization... for now :) 


PPA196: Pink with Sprinkles on Top

In a couple days, my niece, Jocelyn, celebrates her 3rd birthday. While I don't know her too well, I do know she is adorable and has the cutest smile! I thought a bright, colourful card from her Auntie would make her day!

I'm posting this card a tad early as I wanted to enter it in the Pal's Paper Arts challenge this week.
I chose to use Pumpkin Pie, Melon Mambo, Early Espresso and Whisper White as my colour combo and I just love how it came together!


The saying in the Create a Cupcake stamp set was just perfect for this card! I stamped the words "pink" and "sprinkles" in pink and orange ink and then fussy-cut them, pasting them back on the sentiment. I embellished it with Melon Mambo candy dots. The cupcake is popped up to give the card some dimension. 


Here's wishing Jocelyn a fun birthday filled with lots of pink, lots of cupcakes, and lots of smiles! 

Card Ingredients:
Stamps: Create a Cupcake
Paper: Whisper White, Early Espresso, Pink Pirouette, Brights DSP
Ink: Early Espresso, Pumpkin Pie, Melon Mambo
Tools: Scallop Circle Punch, 1-3/4" Circle punch, Cupcake Builder punch
Accessories: Melon Mambo candy dots, Rhinestone (Michael's)

Saturday, 22 March 2014

A Tri-Fold Owl Birthday Card

A couple weeks ago, I posted a fun owl birthday card that I made for my niece (click here to see original post). My initial inspiration came from this adorable card. I loved it so much that I made a second card, this time using the tri-fold. I stuck with the same colour combo, covering each panel with patterned designer paper and randomly placing the punch art owls throughout the card. 


So fun, right? This card is sure to make anyone smile on their birthday! 


I am entering this clean and layered card in The Card Concept challenge this week:


Thanks for stopping by! Enjoy your weekend!

Card Ingredients:
Stamps: Remembering Your Birthday
Paper: Crumb Cake, Coastal Cabana, Real Red, Early Espresso, Whisper White, Basic Black, Bermuda Bay, Polka Dot Parade DSP, Fresh Prints DSP, Brights DSP, 2013-2015 In-Colour DSP
Ink: Bermuda Bay
Tools: Circles nestabilities, Scallop Circles nestabilities, Owl Builder punch, Petite Pennant Builder punch, Heart to Heart punch, Little Leaves sizzlit die
Accessories: Bakers twine

Friday, 21 March 2014

Inspired By...Gorgeous Art Prints

So far, all winter I've prevented myself from getting sick...however, on the first day of Spring I feel a cold coming on! I guess it's inevitable with the season change! With that said, I really hope it doesn't last too long... I've heard about the Organic Cold 911 tea from David's Tea and this is the perfect time to try it. With a soothing mix of peppermint, juniper berries, orange peel and natural eucalyptus oils, it has already given me emergency relief! Oh how I love David's Tea! 

For today's "Inspired By...", Karly chose a beautiful photo of art prints.


This comes from a fabulous shop on Etsy - 7 Wonders Design - check it out!

I used a simple sketch from Fusion Card Challenge and played along with a clean & simple theme at The Paper Players


Combine all three challenges and this is what I came up with:


This is a 4" x 4" card. I really like it! Petal Parade has probably become one of my favourite go-to stamp sets lately for flowers. They are just so Spring-y! (if that's a word :)) And the blossom in the inspirational photo that Karly chose above reminded me of the blossom in this stamp set! The stamp is actually only half this flower, so I stamped two of them to make it a complete flower (of course, using the handy-dandy Stamp-a-ma-jig!). The arrow image and the sentiment are popped up to give the card some dimension. I love how the ruffled ribbon adds that perfect embellishment. Also, as you can see, the card front itself is embossed with the new Arrows embossing folder from Stampin Up. Love how it coordinates with the arrow stamp! 


A matching envelope finishes it off.

Thanks for stopping by! 

Card Ingredients:
Stamps: Petal Parade, Short & Sweet
Paper: Smokey Slate, Pool Party, Whisper White
Ink: Smokey Slate, Pool Party, Crisp Cantaloupe
Tools: Arrows embossing folder
Accessories: Crisp Cantaloupe ruffled stretch trim, Rhinestone (Michael's)

Thursday, 20 March 2014

A Multi-Layered Birthday Card

Happy First Day of Spring!


For today's KCRR challenge we have a versatile selection of elements:


Lucky Limeade
Birthday
Decorate Inside of Card

I decided to pair this challenge with a couple others. The Pink Elephant has a recipe challenge this week which happened to work quite well with what I had in mind! 


Lots of Layers
Ribbon
Pinch of Green 

And the Shabby Tea Room has a simple theme challenge this week:

'Anything Goes'

I combined all three challenges to make this multi-layered, bright and cheery birthday card:


I love the layered look in this card. After sketching out my design, I combined embossed cardstock, designer paper, punched out shapes and stamped images to make this fun layout.  The new Decorative Dots embossing folder adds the perfect texture to this card. I embellished the card with Lucky Limeade ruffled ribbon, bakers twine and a rhinestone on the cupcake. 


I kept it simple on the inside of the card and simply layered a scalloped edge border and striped designer paper. 


Thanks for stopping by! Hope it's starting to feel like Spring wherever you are! 

Make sure to hop on over to Karly's Creations to see what she has created with these 3 elements! I've seen her card and it's absolutely gorgeous! 

Join us tomorrow for a new inspirational photo challenge! 

Card Ingredients:
Stamps: Create a Cupcake
Paper: Lucky Limeade, Daffodil Delight, Tangerine Tango, Early Espresso, Whisper White, Summer Smooches DSP, Polka Dot Parade DSP, 2010-2012 In-Colour DSP, Brights DSP
Ink: Early Espresso
Tools: Scallop Squares nestabilities, Cupcake Builder punch, Banner punch
Accessories: Lucky Limeade ruffled ribbon, Early Espresso bakers twine, Rhinestone (Michael's)

Monday, 17 March 2014

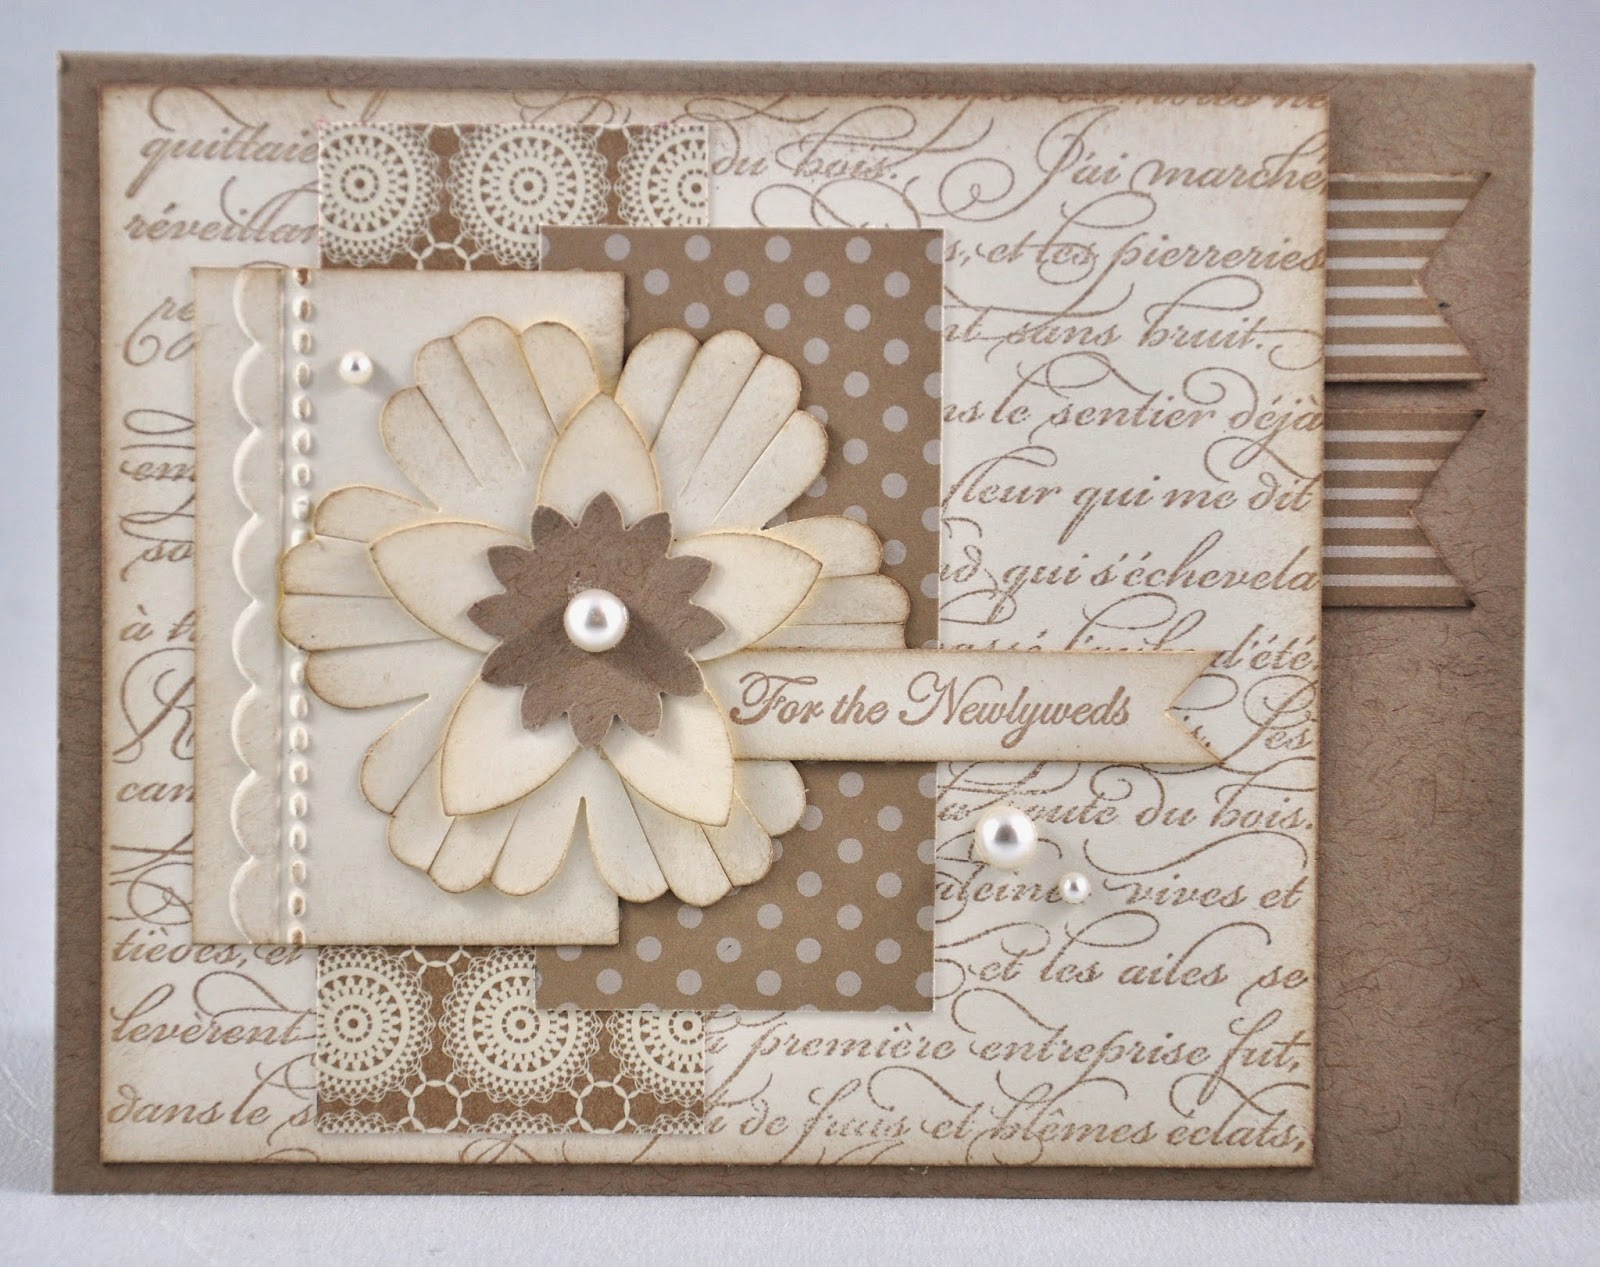
DS142 For the Newlyweds

It's hard to face another work week after a nice relaxing and productive weekend of visiting with friends, crossing things off the to-do list, enjoying the mild weather, and papercrafting! 

I've been working on quite a few wedding and bridal shower cards lately as I seem to be lacking those in my collection of cards. One of the wedding cards I made was inspired by the latest Deconstructed Sketch:


I LOVE the layers in this sketch! I decided to stick with a soft and subtle colour combo for this wedding card: Crumb Cake and Very Vanilla. Here's how it turned out:


I used the elegant French Script stamp for the background, and layered pieces of Crumb Cake designer paper on top. The top layer of Very Vanilla cardstock is embossed with a scallop stitched design. The edges of the punched out flowers and the sentiment are sponged with Crumb Cake ink to soften the look and pearls are added to embellish the card.


Thanks for stopping by! 

Card Ingredients:
Stamps: French Script background stamp, Teeny Tiny Wishes
Paper: Crumb Cake, Very Vanilla, Neutrals DSP
Ink: Crumb Cake
Tools: Needlepoint Border embossing folder, Blossom punch, Five Petal Flower punch, Boho Blossoms punch
Accessories: Pearls (Michael's)

Sunday, 16 March 2014

100% Perfect Precious Baby

Recently, a friend of mine had a beautiful baby girl named Madelyn Joy. This special occasion called for a custom-made "Congratulations" greeting card! 


I decided to make the card a different size than usual. The card measures 7" x 3.5" and the envelope punch board made it easy to create the perfect-sized envelope for this card. I used the "That's the Ticket" stamp set for the first time on this card and personalized it by adding the baby's name to one of the ticket stamps. The adorable toucan, itty bitty flowers, and rhinestones add the perfect touch to this card!


I got to hold sweet Madelyn today and am so happy for her family! What a wonderful blessing from God! 

Card Ingredients:
Stamps: Zoo Babies, That's the Ticket
Paper: Smokey Slate, Calypso Coral, Whisper White, Crisp Cantaloupe, 2013-2014 In-Colour DSP, 2010-2012 In-Colour DSP
Ink: Smokey Slate, Calypso Coral, Crisp Cantaloupe
Tools: 1-3/8" Circle punch, Large Scallop punch, Circle nestabilities, Scallop Circle nestabilities, Ticket Duo Builder punch, Itty Bitty punch pack
Accessories: Rhinestones (Michael's)

Friday, 14 March 2014

Inspired By... Pastel Spring Colours

Another week gone by, and that much closer to Spring! While Eastern Canada has been experiencing snow storms and cold temps, surprisingly we have been getting Spring-like temperatures, melting the piles of snow away! Although, because it's Prince George we may experience that one last blast of winter, but right now I'm holding on to this lovely weather! 

I thought it would be fitting to choose a Spring-like photo for this week's inspirational photo challenge! 


IB #39

The part of the photo that stood out to me was the colours of the jars in the top right picture. I combined this challenge with a sketch from Sketchbook Saturday.


At first I wasn't sure of this colour combo, but I like the arrangement! I used one of the itty bitty punches for the pink flowers and added rhinestones to embellish them. The large flower, bird and sentiment are popped up to give the card some dimension. 


Thanks for stopping by! Make sure to drop by Karly's Creations to see how this photo inspired her! 

Card Ingredients:
Stamps: Morning Meadow (hostess), Gorgeous Grunge
Paper: WIsteria Wonder, So Saffron, Whisper White, Pink Pirouette, Blushing Bride
Ink: Pool Party, Pistachio Pudding, So Saffron, Wisteria Wonder marker
Tools: Distress tool
Accessories: Wisteria Wonder ruffled ribbon, rhinestones (Michael's)