Sunday, 7 April 2013

DS96 & PP156 {Baby Boy Sailboat Card}

Despite the rain, yesterday was a good day! And the rain just makes the snow melt and wash away, so it's not such a bad thing! I spent the morning cleaning the apartment and my crafting table (scraps of paper everywhere!). I then picked up my hubby from the airport (it was SO good to see him!) and spent the rest of the day papercrafting (only 2 weeks left before the craft show!)

For today's card, I played along with two challenges: Deconstructed Sketch and Pal's Paper Arts. 


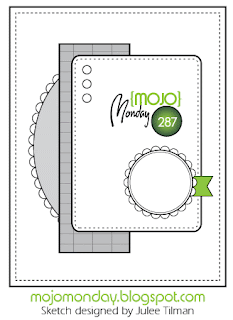
I love this colour combo! It's perfect for a baby boy card. And the sketch has just enough layers. Instead of the heart shape, I decided to put together a sailboat using punch art.


It was super easy to make! I simply cut a 1-3/8" circle in half for the boat itself, and the sails were created by cutting 1-1/4" and 1" squares in half. I popped it up to give it some dimension. A small green heart is added to one of the sails and bakers twine is wrapped around the boat for an added embellishment.


Thanks for looking!

Card Ingredients:

Stamps: Teeny Tiny Wishes
Paper: Bashful Blue, Marina Mist, Certainly Celery, Whisper White, Crumb Cake, Polka Dot Parade DSP, Subtles DSP
Ink: Marina Mist
Tools: 1-3/8" Circle punch, 1-1/4" Square punch, 1" Square punch, Owl Builder punch, 3/4" Circle punch, 1" Circle punch, Corner Rounder punch, Perfect Polka Dots embossing folder
Accessories: Early Espresso bakers twine, Marina Mist 1/4" Taffeta Ribbon

Saturday, 6 April 2013

Inspired By... A Beautiful Vintage Headband

It's the weekend! So happy Saturday is finally here - I get to see my hubby today! It's been a long week filled with ups and downs (yesterday, especially, dragggged on!). Hoping this will be a productive weekend! I need to build up my stock of crafty items!

Saturday means a new challenge with...
It was my pick this week and I came across a photo of a beautiful headband that I found on Etsy.


Isn't it gorgeous?! I love the spring colours and the vintage style. The lady who made this headband is so talented! Take a look at her Etsy shop: Aldona's Boutique.

I was so inspired by this photo! I incorporated the colours, as well as the vintage style into my card. The elegance of it is perfect for a newlywed greeting card!


I just LOVE how it turned out! It is somewhat different than what I usually create. I may have to incorporate this vintage style into more of my cards. I started off with a sketch from My Favourite Things. And my creative imagination went from there!

I wrapped Victoria Crochet trim ribbon around the card front - I thought it was a perfect resemblance of the head band itself. I cut roses from the Flower Trim ribbon and sponged each one with different colours. Strips of flagged ribbon are added. I stamped the Ribbon Cotton with Bloomin Marvelous stamps in Tangerine Tango and Old Olive and sponged them lightly to give them some colour. I then added pearls to embellish the roses. I am also entering this card in the Stampin Royalty challenge this week. Their theme is "Ribbons and Pearls".


This is definitely one of my favourite wedding cards!

Make sure to check out how this photo inspired Karly by visiting her blog, Karly's Creations!

Thanks for stopping by! Enjoy your Saturday!

Card Ingredients:
Stamps: Teeny Tiny Wishes
Paper: So Saffron, Tangerine Tango, Very Vanilla, Pear Pizzaz, Old Olive, Summer Smooches DSP, Brights DSP
Ink: Tangerine Tango, So Saffron, Old Olive, Cherry Cobbler
Tools: Little Leaves sizzlits die, Circles Nestabilities, Word Window punch
Accessories: Pearls (Michael's), So Saffron grosgrain ribbon, Ribbon Cotton, Victoria Crochet Trim ribbon

Friday, 5 April 2013

KCRR #12 {Butterfly Prints}

Happy Friday!
Yesterday, Stampin Up made an announcement, introducing a Colour Refresh for the new 2013-2014 catalogue! This means that some colours are being discontinued while others are being brought back. Here's the complete list:
I am SO happy that Island Indigo and Pool Party are here to stay! I absolutely love these colours! And there are so many other great colours that are coming back. A couple that I'm slightly upset about is Bashful Blue and Certainly Celery... Unfortunately, these are being discontinued. However, I think I will get used to Pear Pizzazz as the new 'light green' and Soft Sky as the new 'light blue'. As much as I dislike change, I think it's a good one!
 
Time for...
 
 
This week's randomly chosen items are as follows (we chose three this week!):
 
Butterfly Prints Stamp Set
Monochromatic
Banner
 
This was a good challenge because it encouraged me to take out a stamp set that I haven't used yet! I love monochromatic colours! I chose Wisteria Wonder and Concord Crush/Elegant Eggplant as the colour combo for my card. I still have a DSP paper stack of old In-Colours that I need to use up and this was the perfect opportunity.
 
 
I wasn't sure at first how I would incorporate a banner in this card, but then after seeing some inspiration on pinterest, I decided to make a banner along the bottom half of the card using all different patterned paper in Concord Crush. I stamped the sentiment "happy birthday" from the Curly Cute stamp set and embossed the edges with a cross-stitched design. The butterflies are stamped in Elegant Eggplant, punched out and popped up.
 
 
Thanks for stopping by! Make sure to visit Karly's Creations to see how Karly incorporated these three elements in her card!
 
Card Ingredients:
Stamps: Butterfly Prints, Curly Cute
Paper: Concord Crush, Wisteria Wonder, Whisper White, 2010-2012 In-Colour DSP
Ink: Elegant Eggplant
Tools: Butterfly Punch, Needlepoint Embossing Folder


Thursday, 4 April 2013

PP139 Tic-Tac-Toe Challenge {Set of Gift Tags}

Even though the work days seem long, it feels like this week is flying by! Last night I came home feeling exhausted... not sure why. I think my body is telling me that I need more sleep! It took a alot of effort to go to Zumba Fitness. I just wanted to stay home and craft and then go to bed early. But, I'm glad I went. It woke me up a bit and made me feel a little more energized. It's a new session and I think it's going to be a good one! The routines were a bit challenging, but I think after a couple more classes I should be able to catch on!

I played along with the Paper Players challenge for today's post. It's a tic-tac-toe challenge! How fun is that?!


SO many choices! I knew for sure that I wanted to make gift tags and I love using ribbon and pearls on my paper craft projects, so I went with ribbon, a tag and pearls. I love working with sketches, but this time I looked through my past card creations and used one of them for inspiration. I love the colour combo of this card I created back in beginning of February and decided to convert it to a gift tag.

 
It's a fairly simple design as I wanted the stamped flower image to stand out. I added a pearl as an embellishment in the center of the flower and tied Tangerine Tango satin ribbon through the hole at the top of the tag. Stampin Royalty's challenge this week happens to be "Ribbon and Pearls". So I decided to enter this project in their challenge as well. I made a set of 6 identical tags:


Thanks for stopping by!

Card Ingredients:
Stamps: Madison Avenue
Paper: Whisper White, Rich Razzleberry, Summer Smooches DSP
Ink: Rich Razzleberry, Tangerine Tango
Tools: 1/4" Circle Punch, Circles Nestabilities, Scallop Circles Nestabilities, Scallop Tag Die
Accessories: Pearl (Michael's), Tangerine Tango satin ribbon (Sale-A-Bration)

Wednesday, 3 April 2013

Clean and Simple Birthday Card

It's Wednesday, which means we're half-way through the work week and that much closer to the weekend! Looking forward to seeing my hubby again! Yesterday, I did not have the greatest start to my day... I was late for work and realized I forgot my lunch when I got to work. Ugh. However, one highlight to my day... I was chosen as a 'Perfect Princess' at Freshly Made Sketches! To see my original post, click here.


For today's card, I decided to play along with the new Retrosketches challenge and a colour combo challenge with Colour Q. It's a fabulous clean and simple sketch this week and the colours are so soft and subtle - these two challenges worked so well together!


As a bonus, I realized as I was making the card that this would also fit perfectly with the Pink Elephant challenge this week.
 

Our challenge theme this week is to:
"Use 3 Decorative Papers & Your Favorite Embellishment"
 
I actually used 6 decorative papers in my card and one of my favourite embellishments - bakers twine. Here's how it turned out:


Thanks for looking! 
 
Card Ingredients:
Stamps: Fabulous Phrases
Paper: Soft Suede, Whisper White, Blushing Bride, Neutrals DSP, Summer Smooches DSP, 2010-2012 In-Colour DSP, 2011-2013 In-Colour DSP, Comfort Cafe DSP
Ink: Soft Suede
Tools: Owl Builder punch
Accessories: Early Espresso Bakers Twine

Tuesday, 2 April 2013

Three Challenges in One

It's been difficult for me to get motivated lately to create papercrafts for the upcoming craft fair. I didn't get quite as many items made on the weekend as I wanted to, but with my hubby gone this week, it gives me lots of time to get caught up. Last night was a good start. I completed two more mini albums and two mother's day cards. I also snuck in a phone call with my hubby, a skype call with my sister, and a phone call with my Mom. It was a good night!

Today's design was created using three different card challenges. Karly and I were brainstorming at work yesterday afternoon which inspired me to create this card:

 
I used a great sketch from Mojo Monday for the layout, a colour combo from Dynamic Duos and a theme from The Pink Elephant.


Our challenge theme this week is to:
"Use 3 Decorative Papers & Your Favorite Embellishment"
 

This sketch was great to work with. And I love that we could choose our own colour to go with Primrose Petals. I chose So Saffron. I think it's a nice pastel contrast against the bright pink. The biggest challenge for me was to use 3 different decorative papers in one card. But, I think I managed to make it work and have it not look too 'busy'. I used neutral colours for the card base and the card front so that the two colours 'popped'. The Primrose Petals cardstock is embossed with the Elegant Bouquet embossing folder. I like adding a little 'bling' to my cards, so I used pearls as embellishments.

 
Thanks for stopping by!
 
Card Ingredients:
Stamps: Teeny Tiny Wishes
Paper: Crumb Cake, Early Espresso, Primrose Petals, Very Vanilla, More Amore DSP, Floral District DSP, Subtles DSP
Ink: Early Espresso
Tools: Large Oval punch, Scallop Oval punch, Circles nestabilities, Scallop Circles nestabilities, Elegant Bouqet embossing folder
Accessories: Pearls (Michael's)

Monday, 1 April 2013

FM103 & SSSC181 {Thank You Teacher}

Unfortunately, it's back to work this morning! It was a quiet Easter weekend without my hubby. Wish I could have been in Ontario to celebrate Easter with family. But, I managed to have a nice relaxing weekend and got quite a few things done. Saturday was spring-cleaning day... I vaccuumed and mopped the floors and did a pile of laundry. Unfortunately, the floors won't stay clean for long -- nice spring weather leads to snow melting and a muddy dog! A skype call with my Dad brightened my Saturday. Sunday afternoon after a nice Easter morning church service, I took a walk with Keta. It was so warm out and there wasn't a cloud in the sky! Here's a pic of me and my puppy :)


Another highlight to my weekend -- one of my cards was chosen as a top pick for two different challenges! Click here for the original post. This card was chosen as a Mashup Glamette for the Friday Mashup (FM102) challenge and an honourable mention at Dynamic Duos!


For today's card, I'm participating in two challenges -- a new mashup challenge with Friday Mashup and a sketch challenge from Sweet Sunday Sketch.


The Friday Mashup challenge this week is to create a project using 'lined paper' or create a project that has a distressed appearance or mash it up! I decided to mash it up. I had the perfect idea in mind. When I think of lined paper, I think of school, so I thought of making a thank you card for a teacher. And this sketch was the perfect layout!

 
I used bright designer paper from the Summer Smooches collection. I then distressed some lined paper by sponging the edges with Early Espresso ink and ripping one of the corners. I then placed this on cardstock and punched one of the edges with the Spiral Border punch. I also distressed the edges of this cardstock using the new distressing tool from Stampin Up.
I created an apple core using using the punch art technique and added a small paperclip as a finishing touch.


Thanks for stopping by!
 

Card Ingredients
Stamps: Curly Cute
Paper: Early Espresso, Whisper White, Lucky Limeade, Real Red, Summer Smooches DSP
Ink: Real Red, Early Espresso, Tim Holtz Distressing Ink (Antique)
Tools: Spiral Border punch, Tab punch, Ribbon Border punch, Fancy Flower punch
Accessories: Paperclip